
Repotting indoor plants can feel intimidating, especially for beginners. Many people worry about damaging roots or shocking the plant. However, when done carefully and at the right time, repotting actually strengthens plant health and encourages new growth.
Indoor plants outgrow their pots over time. Soil becomes compacted, nutrients get depleted, and roots need more space. Repotting refreshes the growing environment and helps plants thrive.
If you’re still learning the fundamentals, this indoor plant care guide explains how soil, watering, and light all work together.
When Should You Repot Indoor Plants?
Repotting is not something you need to do frequently. Most indoor plants only require repotting every 12–18 months.
Here are signs your plant may need a new pot:
-
Roots growing out of drainage holes
-
Soil drying out very quickly
-
Water pooling on top of soil
-
Slow or stalled growth
-
Yellow leaves despite proper care
If yellowing appears often, this guide on why plant leaves turn yellow can help you diagnose whether soil or watering is the issue.
Best Time of Year to Repot
The best time to repot most indoor plants is during spring or early summer. During this period, plants are actively growing and recover faster from root disturbance.
Avoid repotting during winter unless the plant is severely root-bound.
What You’ll Need Before You Start
Repotting is simple when you prepare properly.
You will need:
-
A new pot (1–2 inches larger in diameter)
-
Fresh potting mix
-
Gloves (optional)
-
A small trowel or spoon
-
Water
Make sure the new pot has drainage holes. Drainage prevents excess moisture buildup.
If you’re unsure about soil types, this guide on the best soil for indoor plants explains what works well for most homes.
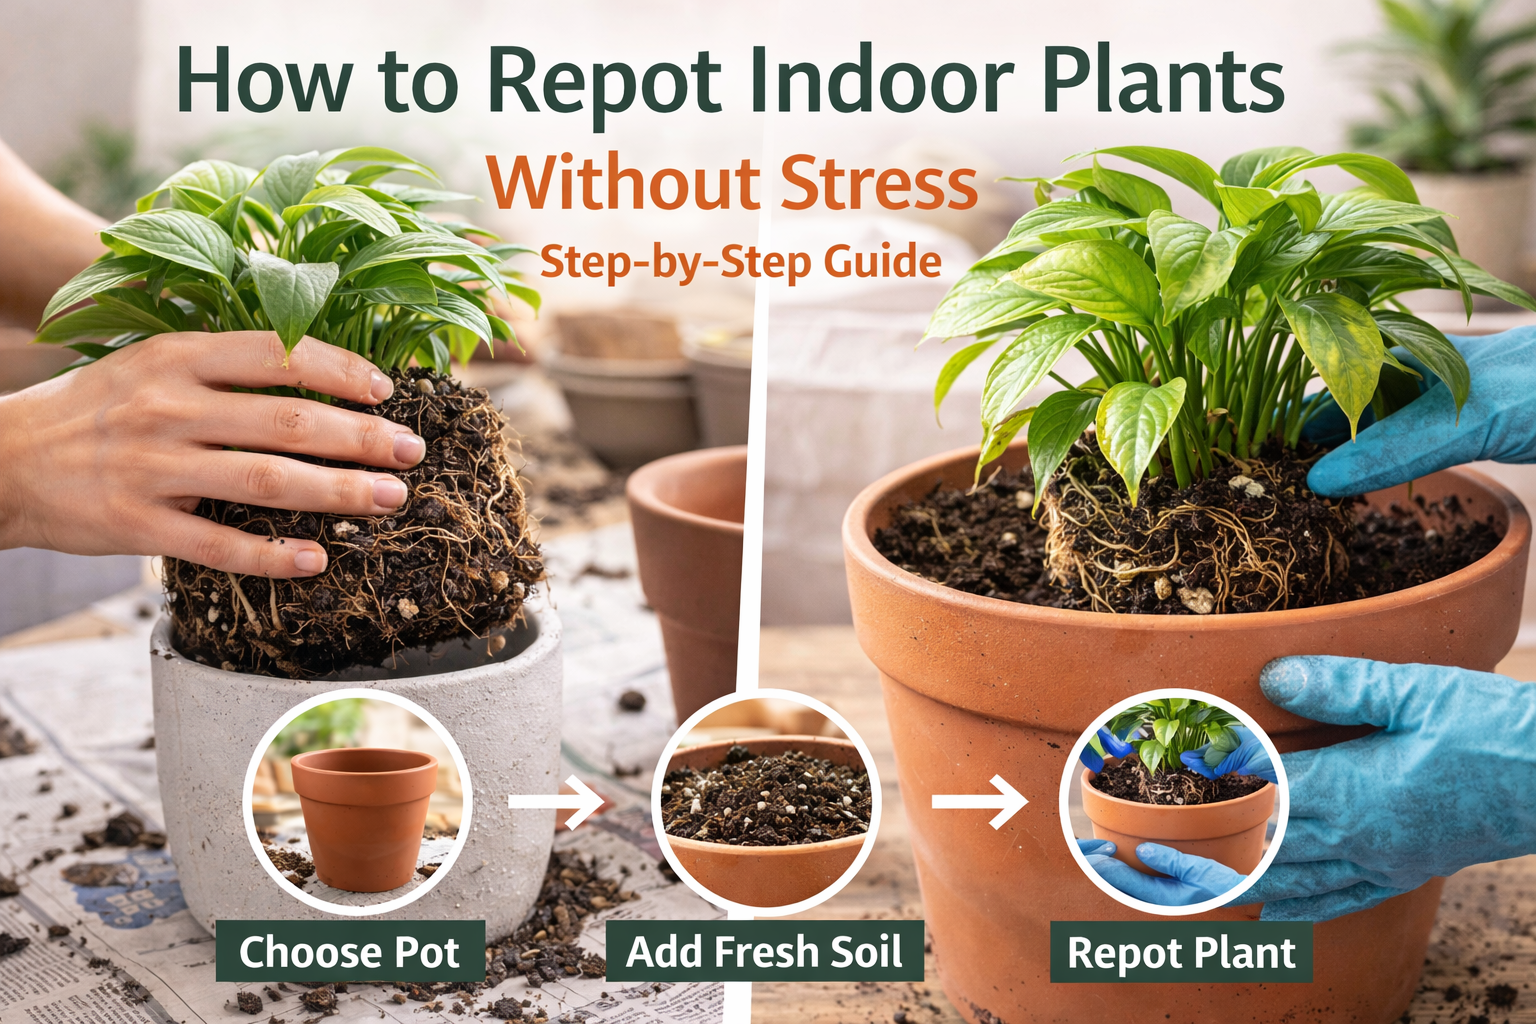
Step-by-Step: How to Repot Indoor Plants
Step 1: Water the Plant Lightly
Watering the plant a day before repotting softens the soil and reduces root stress.
Step 2: Remove the Plant Gently
Hold the base of the plant and tilt the pot sideways. Tap the sides gently to loosen the root ball.
Avoid pulling on stems directly.
Step 3: Inspect the Roots
Healthy roots are usually white or light-colored. Trim any black, mushy, or foul-smelling roots.
If roots are tightly circling the pot, gently loosen them.
Step 4: Add Fresh Soil to the New Pot
Add a base layer of fresh potting mix. Place the plant in the center and fill around it with soil.
Press lightly to remove large air pockets but avoid compacting the soil too tightly.
Step 5: Water After Repotting
Water thoroughly until excess drains out.
After watering, place the plant in indirect light and allow it time to adjust.
If watering habits have been confusing before, reviewing how often to water indoor plants can prevent future stress.
Aftercare Tips
Repotting can temporarily stress plants. However, most recover quickly when cared for properly.
-
Avoid direct sunlight for a few days
-
Do not fertilize immediately
-
Monitor soil moisture
-
Expect mild drooping for 1–2 days
Overwatering after repotting is common. If symptoms appear, this comparison of overwatering vs underwatering indoor plants helps you tell the difference.
Common Repotting Mistakes
Even simple tasks can go wrong if rushed.
Avoid these mistakes:
-
Choosing a pot that is too large
-
Using heavy garden soil
-
Repotting too frequently
-
Compacting soil too tightly
-
Watering excessively right after repotting
Patience is important. Plants adjust gradually.
Frequently Asked Questions
How much bigger should the new pot be?
Only 1–2 inches wider than the current pot. Too much extra soil holds excess moisture.
Can I reuse old soil?
It’s better to use fresh soil to replenish nutrients and improve drainage.
Is it normal for leaves to droop after repotting?
Yes, slight drooping is common for a short time.
Final Thoughts
Repotting is not as complicated as it seems. When done at the right time and with proper soil, it supports healthier roots and stronger growth.
Instead of fearing the process, view it as refreshing your plant’s environment. With practice, repotting becomes a simple and rewarding part of indoor plant care.